Table of Contents
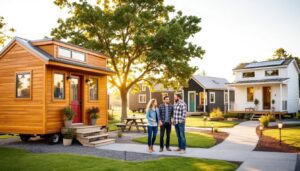
ToggleTiny homes aren’t just a trend, they’re a pragmatic response to rising housing costs, environmental concerns, and the desire for simpler living. Whether you’re downsizing, building a backyard ADU, or chasing location independence, constructing a tiny home requires real planning and hands-on work. This isn’t a weekend project. You’ll deal with foundation choices, code compliance, tight framing tolerances, and creative systems integration. But with the right approach, a well-built tiny home offers quality living in 100–400 square feet. Here’s how to plan and execute a tiny home build from the ground up.
Key Takeaways
- Building tiny homes costs $30,000–$80,000 for a DIY project, making them significantly cheaper than traditional construction while offering quality living in 100–400 square feet.
- Before purchasing materials, research local zoning laws and building codes with your planning department, as regulations around tiny homes and THOWs (Tiny Houses on Wheels) vary widely and can make or break your project.
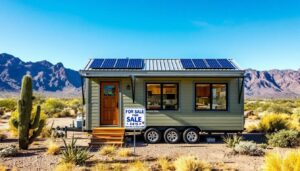
- Choose between a trailer foundation for mobility and flexibility or a permanent foundation for full code compliance and easier financing, based on your priorities and long-term plans.
- Maximize small spaces through vertical storage, multi-function furniture, sleeping lofts, and downsized appliances rather than trying to cram in standard-size features.
- Critical systems like electrical and plumbing require permits and inspections; prioritize professional help or licensing on structural components to ensure safety and code compliance.
- Plan for a 6–12 month timeline working part-time, and budget an extra 10–15% for mistakes and overlooked costs, as fasteners, flashing, and trim expenses add up quickly.
What Is a Tiny Home and Why Build One?
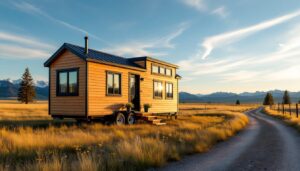
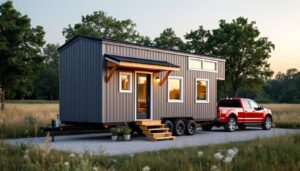
A tiny home typically ranges from 100 to 400 square feet, though some jurisdictions define them differently. They fall into two categories: THOW (Tiny House on Wheels), built on a trailer chassis, and foundation-built units on permanent sites.
People build tiny homes for several reasons. Cost is a major driver, total material and labor costs often run $30,000–$80,000 for a DIY build, versus six figures for traditional construction. Mobility appeals to those who want to relocate without selling. Sustainability matters too: smaller footprints mean reduced energy use and material waste.
But tiny living isn’t for everyone. Storage is limited. Hosting guests requires creativity. Resale markets are still developing. And depending on your location, finding legal parking or a buildable lot can be harder than the construction itself.
Planning Your Tiny Home Build: Essential Considerations Before You Start
Start with a realistic assessment of your skills, budget, and timeline. If you’ve framed a shed or remodeled a bathroom, you have a foundation. If you’ve never swung a framing hammer, plan for a steep learning curve or budget for professional help on critical systems, electrical, plumbing, and structural tie-downs.
Create a detailed plan before buying materials. Sketch your layout, noting door swings, appliance locations, and loft access. Decide on utilities: will you connect to grid power and municipal water, or go off-grid with solar panels and a composting toilet? Each choice affects your design and budget.
Material selection matters. Use kiln-dried framing lumber (2×4 studs are actually 1.5″ × 3.5″) to avoid warping in a small space. For exterior sheathing, 7/16″ OSB or ½” plywood provides adequate shear strength. Choose tongue-and-groove subfloor panels for rigidity underfoot.
Budget 10–15% extra for mistakes, design changes, and overlooked items. Fasteners, flashing, caulk, and trim add up fast.
Understanding Zoning Laws and Building Codes
This is where most tiny home projects hit a wall. Zoning laws dictate where you can place a dwelling, minimum square footage requirements, and whether THOWs are classified as RVs (which many residential zones prohibit as primary dwellings).
Building codes govern construction standards. The International Residential Code (IRC) Appendix Q addresses tiny homes under 400 square feet, setting requirements for ceiling heights (6’8″ minimum in most areas, 6’4″ in bathrooms and lofts), egress windows, stair dimensions, and loft guards. Some municipalities have adopted Appendix Q: others haven’t.
For THOWs, the situation is murkier. The ANSI A119.5 standard (originally for RVs) has been adapted by some manufacturers, but many jurisdictions don’t recognize it for permanent dwellings. You might need to work with local building officials to get tiny house permits or consider parking on private land with landowner permission.
Action step: Before buying materials, visit your local planning and building department. Ask specifically about:
- Minimum dwelling size
- THOW classification and parking rules
- Foundation requirements
- Utility connection mandates
- Whether Appendix Q applies
If your area is restrictive, research nearby counties or consider building on rural land where codes may be more flexible.
Choosing the Right Foundation: Wheels vs. Permanent
Your foundation choice defines your build method, legal status, and long-term flexibility.
Trailers (THOW): A typical tiny home trailer uses a triple-axle steel frame rated for 10,000–14,000 lbs. Trailer manufacturers like PJ or Iron Eagle build them to DOT standards with proper lighting, fenders, and tie-down points. The deck is usually 8’–8.5′ wide and 20’–28′ long.
Pros: Mobility, potentially avoiding some building codes (if classified as an RV), easier to sell or relocate.
Cons: Weight limits require careful material selection. Framing must withstand road vibration, use hurricane ties and structural adhesive. You’ll need a heavy-duty truck (¾-ton minimum) for towing. Road height restrictions (typically 13’6″) limit loft headroom.
Permanent Foundations: These include concrete slab, pier-and-beam, or skid foundations. A frost-protected shallow foundation works in cold climates and costs less than a full basement.
Pros: No weight limits, full code compliance, easier utility connections, better insulation options (spray foam under a slab performs well), potentially qualifies for traditional financing.
Cons: Not relocatable. Requires excavation, permits, and often professional work. Higher upfront costs.
Skid foundations (pressure-treated 6×6 timbers on gravel) offer a middle ground, semi-permanent and easier to level on uneven terrain. They’re common for Amish-built tiny homes and rural builds.
Choose based on your priorities. If you value mobility and have a flexible parking situation, go with a trailer. If you own land and want a permitted, long-term dwelling, build on a foundation.
Step-by-Step Construction Process for Tiny Homes
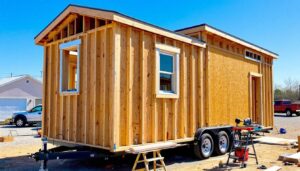
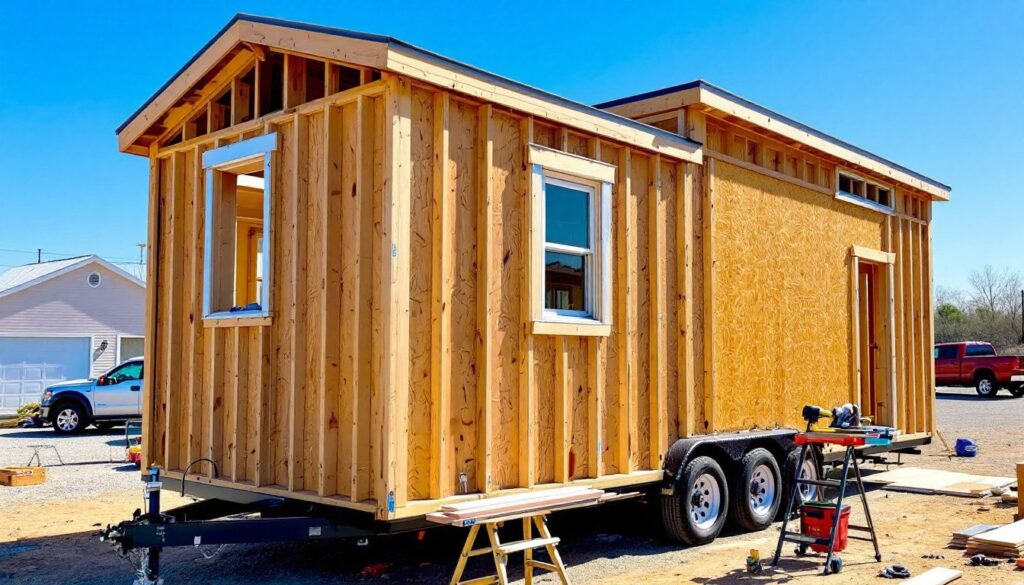
1. Frame the Floor: For THOWs, bolt 2×6 or 2×8 floor joists perpendicular to the trailer frame at 16″ on-center. Use galvanized bolts and add cross-bracing to prevent racking. Install rigid foam insulation (2″ XPS) between joists, then screw down ¾” tongue-and-groove subfloor. For foundation builds, follow standard floor framing over your chosen foundation type.
2. Frame the Walls: Build walls flat on the subfloor using 2×4 studs at 16″ or 24″ on-center. For THOWs, 24″ spacing reduces weight but requires ½” or thicker sheathing. Install king studs, jack studs, and headers above window and door openings, use a double 2×6 header for openings up to 4′ wide. Square the walls carefully (diagonal measurements should match) before standing them up.
3. Sheath and Wrap: Once walls are plumb and braced, attach 7/16″ OSB or ½” plywood sheathing. Apply housewrap (Tyvek or similar) lapping each course and taping seams. This is your drainage plane.
4. Frame the Roof: Gable or shed roofs are simplest. Gable roofs provide loft headroom but add height (watch that 13’6″ road limit for THOWs). Cut 2×4 or 2×6 rafters to the correct angle (use a Speed Square and rafter tables or a construction calculator). Install a ridge board and secure rafters with hurricane ties. Sheath with ½” OSB or plywood, then apply underlayment (synthetic felt or ice-and-water shield in vulnerable areas) and your chosen roofing, metal roofing is light and durable, asphalt shingles are cheaper but heavier.
5. Install Windows and Doors: Use vinyl or aluminum-framed windows rated for RVs or residential use. Flash aggressively, use proper flashing techniques to prevent water infiltration. An outswing exterior door saves interior space.
6. Rough-In Systems: Run electrical according to NEC (National Electrical Code), use a licensed electrician or get a permit and inspection. For 120V systems, a 100-amp or 50-amp RV-style service is common. Install PEX plumbing (it’s flexible and freeze-resistant) for water supply and ABS or PVC for drains. If off-grid, plan for a 12V DC system or inverter setup with battery storage.
7. Insulate: Spray foam (closed-cell) offers the best R-value per inch (R-6 to R-7) and seals air leaks, critical in a tiny space. Mineral wool batts (Roxul) are a budget-friendly, fire-resistant alternative. Target R-13 to R-15 in walls, R-30+ in the roof.
8. Interior Finish: Install ½” drywall or tongue-and-groove pine paneling on walls and ceilings. Use lightweight materials where possible, vinyl plank flooring over a thin underlayment works well and handles movement better than tile. Build cabinets and install fixtures.
Safety note: Wear safety glasses, hearing protection, and a dust mask during framing and cutting. Use a fall protection harness when working on the roof. Tiny home builds involve all the same hazards as conventional construction, treat them seriously.
Smart Design Strategies to Maximize Small Spaces
Good tiny home design isn’t about cramming in features, it’s about eliminating waste and making every inch count.
Vertical Storage: Use the full wall height. Install cabinets to the ceiling, add hooks on every available surface, and incorporate shelving into stair risers.
Multi-Function Furniture: A dinette that converts to a bed, a desk that folds into the wall, or a storage ottoman serving as seating all reduce clutter.
Lofts: Sleeping lofts free up main-floor space but require guardrails 36″ high per Appendix Q. Ladder access is compact but awkward: alternating-tread stairs (also called ship’s ladders) are easier to navigate and code-compliant if built correctly.
Light and Openness: Large windows (especially on the long walls of a THOW) and light-colored interiors make spaces feel larger. Reflective surfaces help. Avoid heavy curtains, use cellular shades for insulation and privacy without blocking light.
Downsized Appliances: An 18″ apartment-size range, 120V countertop convection oven, or two-burner induction cooktop replaces a full-size stove. Combo washer-dryers (ventless models) fit in tight spaces. Consider whether you truly need an oven or full-size fridge, or if a 12V compressor fridge suffices.
Bathroom Efficiency: A corner shower (32″×32″ minimum) with a neo-angle door saves space compared to a tub. Wall-hung sinks and toilets keep the floor clear. Pocket doors eliminate door-swing clearance.
Study plans from experienced builders or sites like Bob Vila’s tiny house plans to see proven layouts. Current tiny home trends emphasize flexible, adaptable spaces over fixed uses.
Budgeting Your Tiny Home Project: Costs and Money-Saving Tips
A realistic DIY tiny home budget breaks down roughly as follows (for a 200 sq ft THOW):
Materials:
- Trailer: $4,500–$7,000
- Framing lumber, sheathing, fasteners: $3,000–$5,000
- Roofing, siding, trim: $2,500–$4,000
- Windows and doors: $1,500–$3,000
- Insulation: $800–$1,500
- Electrical and plumbing materials: $1,200–$2,500
- Interior finishes, flooring, paint: $2,000–$4,000
- Appliances and fixtures: $2,000–$5,000
- Total materials: $17,500–$32,000
Add tools if you don’t own them, a circular saw, drill/driver, framing nailer, and miter saw are essential. Renting a pneumatic nailer ($40/day) beats buying if it’s a one-time build.
Labor: DIY saves $20,000–$40,000 compared to hiring out. Budget for professional help on electrical (if required by code) and possibly plumbing inspections. Hiring finish carpenters for custom cabinetry can be worth it if your skills are limited.
Hidden Costs:
- Permits and inspections: $500–$2,000 (varies widely)
- Tool purchases or rentals: $500–$2,000
- Delivery fees for materials: $200–$800
- Waste disposal: $300–$600
Money-Saving Tips:
- Buy materials in bulk or during sales. Lumber prices fluctuate, time your purchase if possible.
- Reclaimed materials work for interior finishes, but avoid using them for structural components or exterior sheathing where code compliance and warranty matter.
- Simplify the design. A rectangular footprint is cheaper and easier to build than complex shapes. Standard window sizes cost less than custom.
- Consider a tiny home shell from a manufacturer, then finish the interior yourself. You’ll pay more than full DIY but save on framing time and get a weathertight structure faster.
- Do your own finish work. Painting, trim installation, and flooring are beginner-friendly and high-cost if hired out.
For detailed expenses, review a comprehensive cost breakdown that covers every phase from foundation to final finishes. Keep receipts and track spending in a spreadsheet, costs creep up fast.
Financing Note: Traditional mortgages don’t typically cover THOWs (they’re considered personal property, not real estate). Personal loans, RV loans, or cash are common. Foundation-built tiny homes on owned land may qualify for construction loans if they meet minimum size and code requirements.
Tiny home construction is achievable for a motivated DIYer with moderate skills. Expect a timeline of 6–12 months working part-time, or 3–6 months full-time. The project demands careful planning, code research, and honest assessment of your abilities. But the result, a custom, mortgage-free (or low-cost) dwelling, makes the sawdust worthwhile. Remember that ongoing maintenance needs will differ from conventional homes, especially for mobile units. Research legal considerations early, measure twice, and don’t skip structural fasteners or waterproofing. Done right, your tiny home will serve you well for decades.